


Understanding the electrical system of a vehicle is crucial for anyone who wants to maintain or repair their car effectively. The intricate network of wires, connectors, and components plays a vital role in the overall functionality of the vehicle. This guide aims to break down the complexities of car wiring and the electrical layout, making it accessible for both beginners and experienced enthusiasts.
Modern vehicles rely heavily on a well-organized electrical system to power various features such as lighting, infotainment, and safety mechanisms. Each component within this system is interconnected through a series of wires, which can make troubleshooting daunting. However, by understanding the fundamentals of how these systems are organized and how electricity flows within them, one can gain valuable insights into the performance and maintenance of their vehicle.
In this article, we will explore the essential elements of car wiring and provide a step-by-step breakdown of the electrical layout. From understanding the battery and fuse box to analyzing the wiring diagrams, this comprehensive approach will equip you with the knowledge needed to navigate the world of automotive electronics confidently.
Understanding Vehicle Wiring Diagrams and Symbols
Vehicle wiring diagrams are essential tools for understanding the electrical system of a car. These diagrams provide a visual representation of the wiring layout and the interconnections between various components. By analyzing these diagrams, technicians can diagnose issues and implement repairs more effectively.
Typically, a wiring diagram includes components such as batteries, switches, lights, and sensors. Each of these elements will be represented by specific symbols that convey vital information about their function and connection within the electrical system. For instance, a battery is often depicted as two parallel lines, while switches may be represented by an open or closed circle, depending on their state.
Understanding these symbols is crucial for interpreting the diagrams accurately. Each symbol follows industry standards, such as those established by the International Organization for Standardization (ISO) or the American National Standards Institute (ANSI), ensuring consistency across different vehicles and manufacturers.
The wiring layout shown in the diagrams also indicates the path of electrical flow. Arrows are commonly used to denote this movement, allowing technicians to trace circuits effectively. Recognizing the flow of current helps in pinpointing potential problems, such as short circuits or open circuits, which can disrupt the system’s functionality.
Moreover, wiring diagrams may include additional information, such as wire colors and gauge specifications. Knowledge of these specifics aids in selecting appropriate replacement parts and ensuring that repairs adhere to safety standards. Properly following the wiring diagrams minimizes the risk of electrical failures and enhances the overall reliability of the vehicle’s electrical system.
In summary, vehicle wiring diagrams and their symbols are indispensable for anyone involved in automotive repairs or modifications. Mastery of these diagrams not only facilitates troubleshooting but also contributes to a deeper understanding of the intricate electrical systems that power modern vehicles.
Common Electrical Problems and Their Troubleshooting Steps
Electrical issues in a vehicle can be both frustrating and challenging to diagnose. Understanding the common problems and their troubleshooting steps can save time and prevent costly repairs. Here are some frequent electrical issues found in vehicle wiring systems and how to address them.
1. Dead Battery
A dead battery is one of the most common issues. Symptoms include dim lights or an engine that won’t start. To troubleshoot:
- Check for any corrosion on battery terminals.
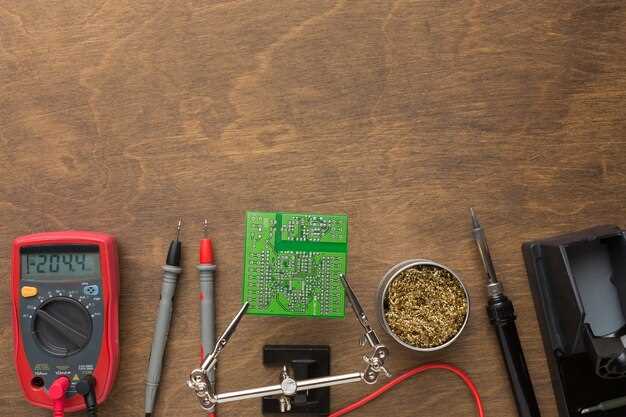
- Test the battery voltage with a multimeter; a reading below 12.4 volts often indicates a need for recharging or replacement.
- Inspect the alternator belt for wear and ensure it is functioning correctly.
2. Blown Fuse
If certain electrical components, like lights or radio, stop working, a blown fuse may be the culprit. Follow these steps:
- Locate the fuse box, usually found under the dashboard or in the engine compartment.
- Identify the corresponding fuse for the failed component and check it for breaks in the wire.
- Replace the fuse with one of the same amperage if it is blown.
3. Faulty Alternator
If the vehicle frequently experiences dead batteries or warning lights on the dashboard, the alternator may be faulty. Troubleshooting includes:
- Checking the voltage output; it should be between 13.7 to 14.7 volts when the engine is running.
- Inspecting the wiring for signs of wear or damage.
- Listening for any unusual noises coming from the alternator, which may indicate internal issues.
4. Short Circuit
A short circuit can cause fuses to blow and may lead to further electrical problems. To identify and fix it:
- Examine the wiring system for damaged wires or corrosion.
- Look for any exposed wires that may be touching metal components of the vehicle.
- Use a multimeter to find the point of the short; it will show continuity where it should not exist.
5. Malfunctioning Electrical Components
If accessories like power windows or headlights are not working, it could be due to faulty components. Steps to troubleshoot include:
- Testing the component; for example, try to operate windows from the driver and passenger sides.
- Inspecting switches for proper function and check for any broken connections.
- Examining the wiring for any signs of wear that could lead to disconnections.
By following these troubleshooting steps, vehicle owners can effectively address common electrical problems in their wiring systems. Regular inspections of the electrical layout can also help prevent issues before they arise.
Upgrading Your Car’s Electrical System: Best Practices
Upgrading your car’s electrical system can significantly enhance performance and reliability. Start by assessing the existing wiring. Inspect for any frayed wires or loose connections that may lead to shorts or failures. Replace any damaged components to ensure a solid foundation for your upgrades.
Consider your electrical load requirements. If you are adding aftermarket components like a powerful stereo system, additional lighting, or other electronics, calculate the total amperage needed. This will help determine if your current wiring and alternator can handle the increased load or if you need to upgrade them as well.
Choose high-quality wiring and connectors for any replacements or additions. Thicker gauge wires can support higher currents without overheating. Ensure all connections are secure and insulated to prevent corrosion and electrical failures.
Upgrading your alternator is crucial if adding significant power draw elements. Ensure that the new alternator is compatible with your vehicle’s electrical system and can provide adequate output. A higher capacity alternator will help maintain battery health and system stability.
Consider a secondary battery system if your setup requires substantial power, especially for vehicles used for off-roading or multimedia purposes. This allows for dedicated power sources without overloading the main battery.
Lastly, invest in a quality fuse box or circuit breaker panel to manage your electrical system safely. Proper fusing protects the wiring and components from overcurrent, ensuring longevity and reliability. Always test your upgrades with a multimeter to verify correct voltage levels and ensure everything operates as intended.